
tl;dr
I was browsing the pwnagotchi discord server and I seen someone mention having a pwnagotchi mounted in a phone holder in a car, This got me thinking about putting one into a phone case of some kind. Join me below to see how I pulled it off.
Hardware
- Raspberry pi zero W/zero W2
- Waveshare 2.13″ eink screen v3/v4
- Powerbank DIY PCB 5v boost+chargeing
- Lipo battery 604050
- 3 pin switch 3mm
- M2.5 hex bolts 6mm x4
- iPhone 13 case
I had built a torch into a iPhone 13 case as a warm up to this project and to see how practical it was to get everything to fit within the tight space. The reason I picked the iPhone 13 case was that its fairly new and has a well established case market to pick from. Also the shape of the iPhone 13 is easy to model with the straight sides walls unlike the iPhone 12 which has rounded walls. If you look at the iPhone 13 dimensions its only 7.65mm thick which is quite thin. I know this would be tight fit.
Screen

I’m using the waveshare 2.13″ v3 screen that everyone uses, really nice and small but high res enough to fit everything on it. I knew that the screen would have to be hard soldered and had to sit next to the pi rather than on top of its headers. I followed this wiki for the pinouts of the screen connected to the pi, I had to remove the 8 pin header off the e ink screen because it was too think with it. I kept the raspberry pi headers and built a lip into the shell to keep the screen level and flat. Its not really that hard to wire up because its only 8 wires.
Raspberry pi
The pi didn’t need much prep work because we didn’t need to solder the headers onto it.
The pwnagotchi version I’m using it the 2.5.7 one with the inverted colour scheme which I think works really well with this build. Just need to burn it to your sd card.
I like to have a button to shut down the pi safely when you want to turn it off, Ive included the code below so all you need to do is wire a button up to pin 7 (GPIO 4) and GND when that’s pressed it will send the shutdown command to the pi.
USB OTG
I really wanted to have USB OTG on this build so it would make it easier to play around with different setting and use the Pwnagotchi manually, I designed the USB C charge port so that it would be a USB 2 port also. When I originally tried I was using version 2.5.4 (pwnagotchi-rpi-bullseye-2.5.4-armhf.img) of the Pwnagotchi touch which was a little unstable and I thought it just wouldn’t work but turns out with a more recent version 2.8.4 (pwnagotchi-rpi-bullseye-2.8.4-armhf) it worked a lot better. If you flip your raspberry pi zero over you should see some gold test points in the board, If you look under the USB OTG port there should be 2 pads, these are the D+ (left one) and D- (right one) Just need to wire up these test pads to the custom USB C USB 2 PCB I published below.
Power
In all my pi projects I like to use the 5v boost powerbank board, its small cheap and will supply the pi with enough power to keep it pwning. The only down side is that you have to keep an eye on the battery levels yourself with the 4 battery levels LED’s on the board. We didn’t have enough space for the Pisugar which would make it more of a safe option.
The battery size I found that would fit was 604050, was hard to find a battery what was thin enough and give enough juice. This battery gives me a few hours of pwning in my pocket which isn’t bad considering the size of the battery.
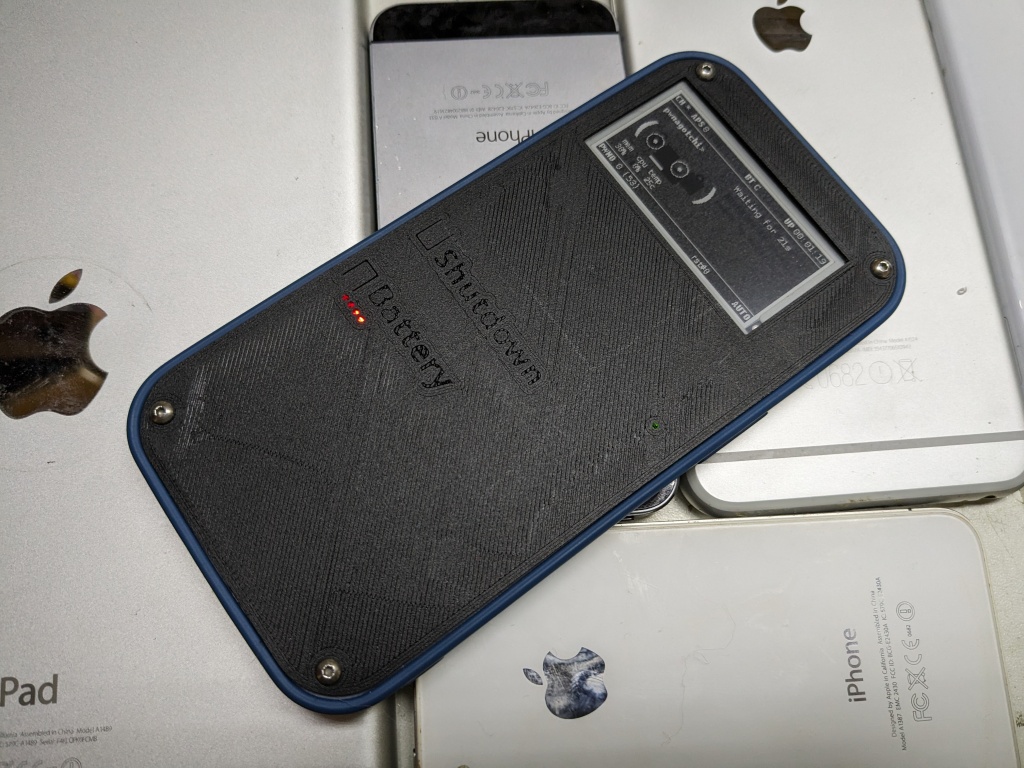
3d printed shell

It was a strange build to pull off because for one I didn’t even know if it would all fit into the iPhone 13 case and two I didn’t know if i would be able to wire it up the way I wanted it to. I think its far from perfect but it suits my needs. I must admit i did cheat with the depth of the shell because the e ink screen measured 7.5mm deep and the iPhone 13 is 7.65mm deep so I took advantage of the case coming up over the top of the iPhone screen to protect it, That space I filled with the top cover of the shell which is held in place with 4 m2.5 hex bolts.
Speaking of the front I had two buttons, one for safe shutdown and the other one is to find out the battery level while the pi is off. I made some cutouts in the front cover so they can be pressed and added labels into the design.
The biggest downside to this build is I couldn’t get USB support to work which makes setting up a pain. I made a USB 2 USB C breakout board after figured it out with iPod USB C mod I did in the past. The board will be available below. If anyone gets it working please leave me a comment below.
You might be asking about heat….Yes its sitting in your jeans pocket next to your leg with zero cooling. I found that its only ever reached 50 degrees C, Its funny because I’ve had other pwnagotchi built’s that I have put in my coat pocket and they have gotten toasty but Ive never run the “memtemp” plugin so I have no idea how hot it ran in those situations.

I even went as far as modeling a fake camera that you can stick to the back of the case if you want. I know it doesn’t look that real but at a glance it wouldn’t look that out of place.
Files
USB 2 USB C PCB files – https://github.com/facelesstech/usb_2_usb_c_pcb
Raspberry pi shutdown button code – https://github.com/facelesstech/pwnagotchi_shutdown_button
iPhone 13 dimensions – https://www.apple.com/uk/iphone-13/specs/
iPwnagotchi13 3d printed shell – https://www.printables.com/model/724353-ipwnagotchi13
Video

Leave a comment